This Tutorial will show you how to add images to my Line Sheet Templates
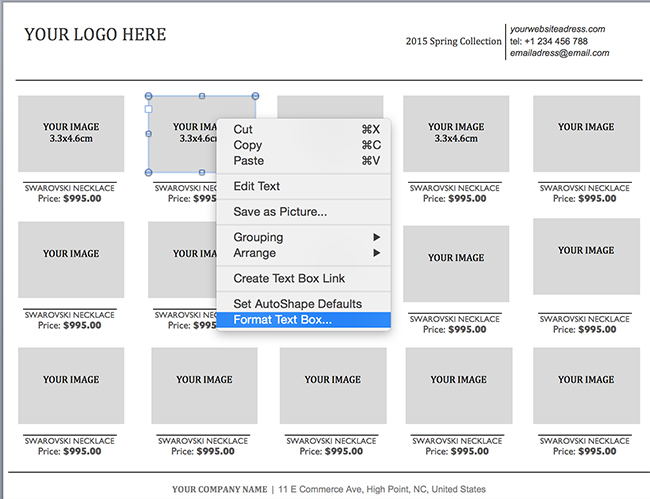
Before adding images to word template, please make sure all your image heights are smaller or equal to the height of the template box.
Please resize your images before adding them to your line sheet. You can use free tools to resize multiple images. You can try some below websites
picresize.com/en/edit
www.img2go.com/resize-image
https://bulkresizephotos.com/en
How to create new page: Duplicate the MS Word and add new images in the new file. You can save each page as a pdf file and use pdfmerge.com tool to merge pdf pages together.
See other way to insert images to text box at the end of this post

Here are the videos that show you how to add images to the Line Sheet Templates
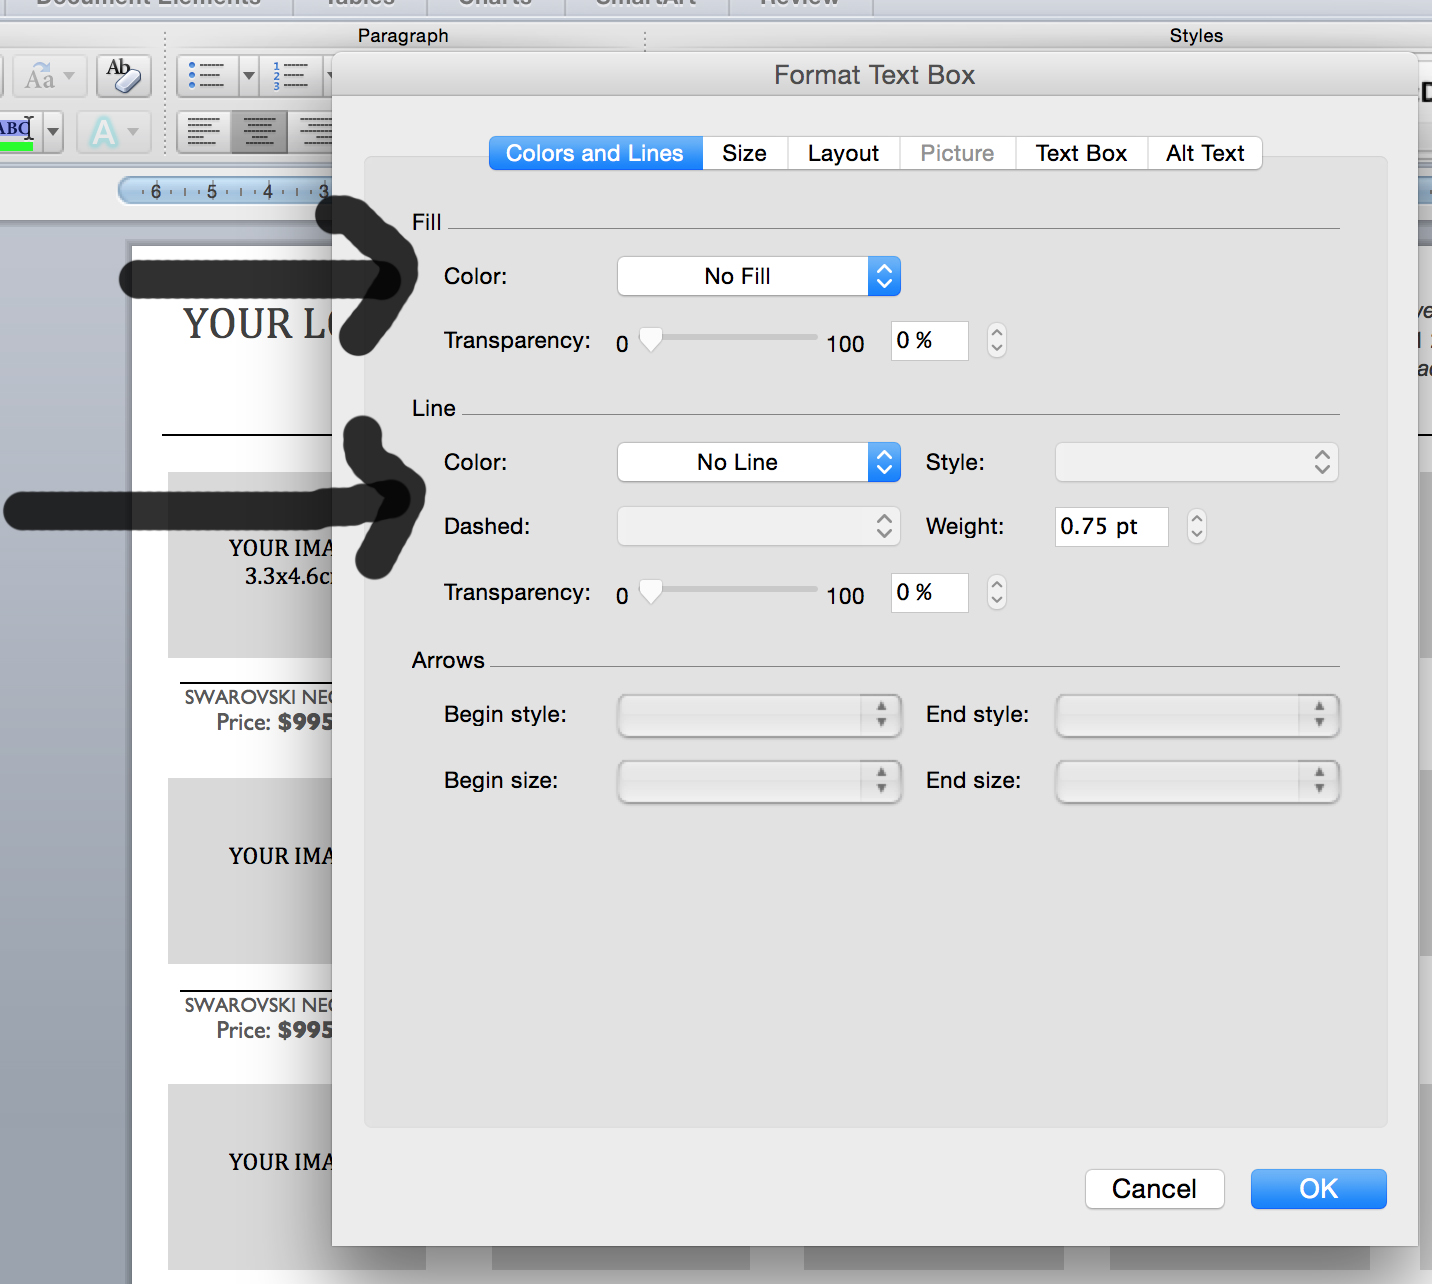
How to remove the grey border and fill color in MS Word:
please right click on the text box, choose the fill color is no color and line color is no line
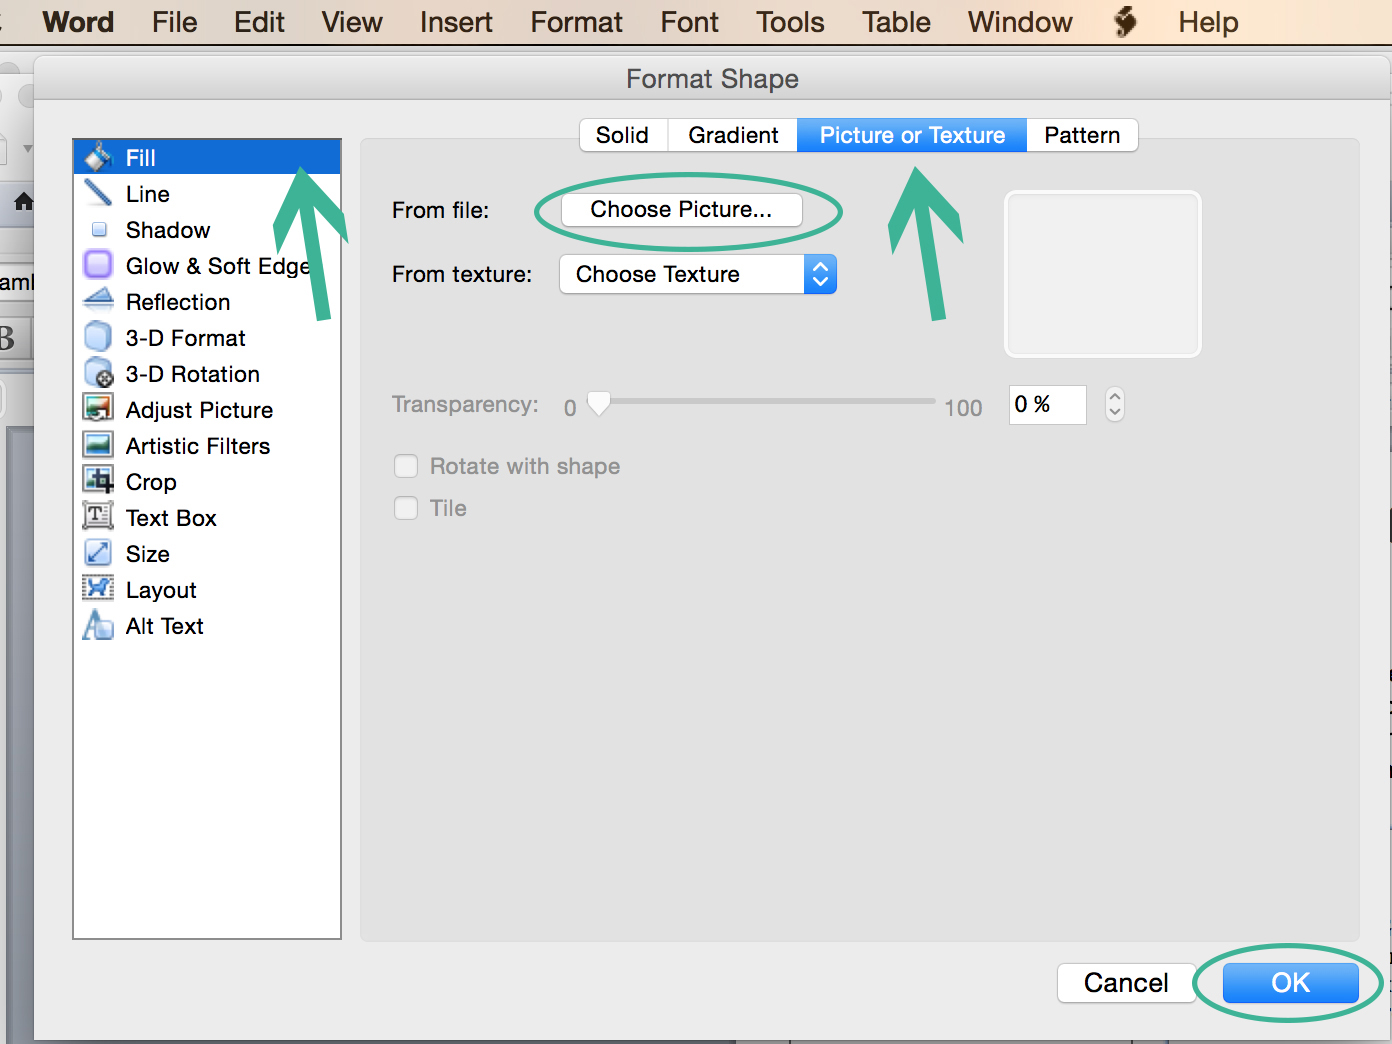
*** OTHER WAY TO INSERT IMAGES TO TEXT BOX
- Please resize your images to the size in the text box before adding it to ms word.
- Right click on the text box the choose “Format Shape”, In the “Format Shape” please click on “Fill”>choose the tab “Picture and texture”>”Choose picture from file” add you picture and press “OK” button
How to create new template page
- To put a blank page into your Word document, place the cursor where you want the new page to begin and then click Insert > Blank Page. The blank page opens, ready for whatever you want to add.
2. Hold the “Shift” button and click on all the text boxes in the template, right click and choose “Group”. Now you can copy the group , paste the group to a new page, move the group to the center or the left, then right click and choose “Ungroup”, here you can add your images and edit the text.
