
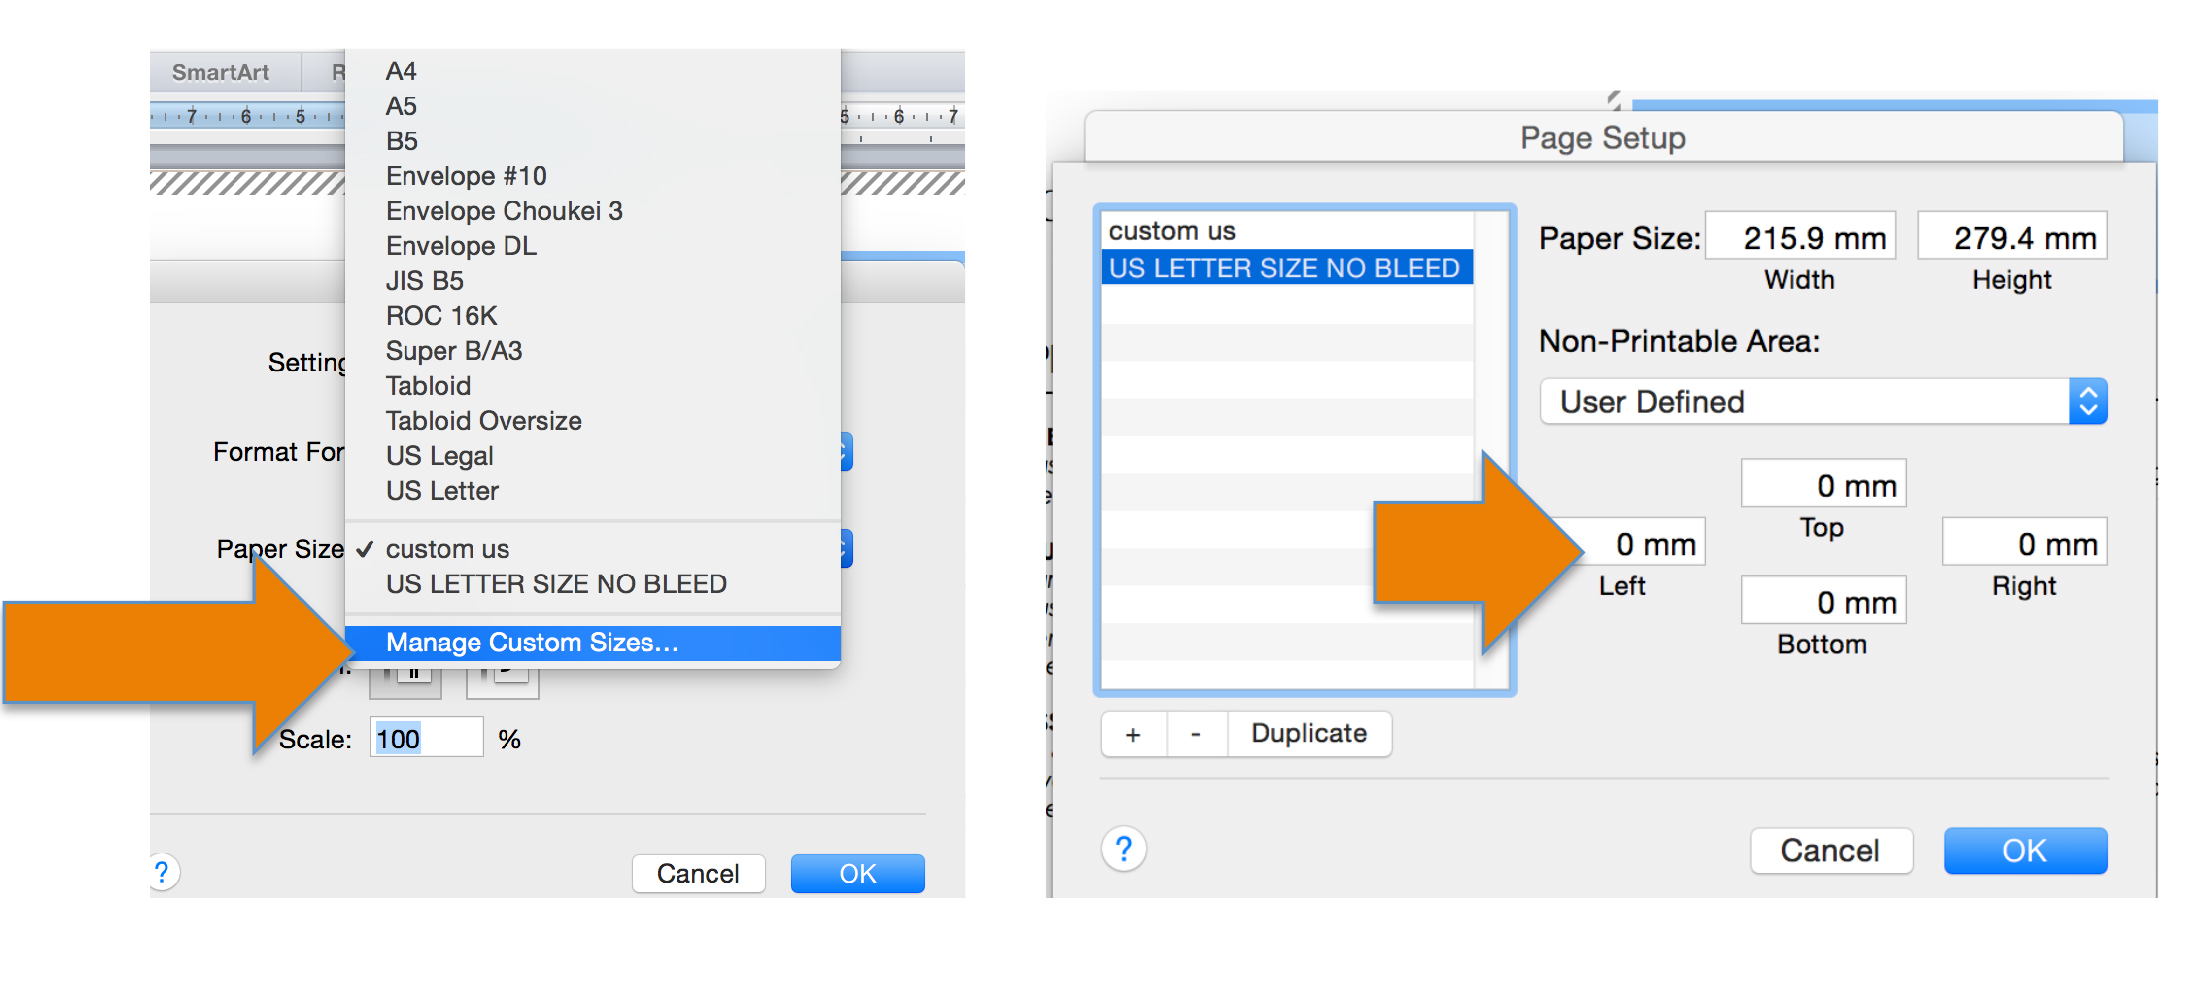
How to make full bleed
- Select File > Page Setup
- In the Paper Size dropdown menu, chose Manage Custom Sizes
- Click on the “+” sign and type a descriptive name
- Under Non-Printable Area, choose User Defined
- Enter zero for all margin values
How to save MS Word document as a PDF

- Open the file you wish to save.
- Click the “File” button in the top left-hand corner of Word.
- Go to Save As > PDF. Use the drop-down format tab to find the .pdf file type
- Type in the desired file name and press Save. This will convert your document and open it in Adobe Reader .
How to reduce your file size
You can reduce the file size and save disk space by compressing pictures in your document. The compression options reduce both the file size and picture dimensions based on how you intend to use the picture, such as viewing on screen or in an e-mail message. You can compress all pictures in the file or just the ones that you select.
Compressing a picture to reduce the file size changes the amount of detail retained in the source picture. This means that after compression, the picture can look different than before it was compressed.
Do any of the following:
Compress all pictures
- On the File menu, click Reduce File Size.
If your document is saved in the older .doc file format, the Reduce File Size option will not be available on the File menu. To use the Reduce File Size option, save your document in the newer .docx file format.
- On the Picture Quality pop-up menu, do one of the following:
| To compress pictures for | Do this |
| Printing | Click Best for printing (220 ppi). |
| Viewing on screen | Click Best for viewing on screen (150 ppi). |
| Sending in an e-mail message | Click Best for sending in e-mail (96 ppi). |
| Keeping the current resolution and minimizing changes to the picture | Click Keep current resolution. |
-
TIP: If you have cropped any pictures, you can reduce the file size even more by selecting the Remove cropped picture regions check box.
Compress the selected picture
- Click the picture that you want to compress.
- Click the Format Picture tab, and then under Adjust, click Compress.

If your document is saved in the older .doc file format, the Compress button will not be available on the Format Picture tab. To use the compress options, save your document in the newer .docx file format.
- On the Picture Quality pop-up menu, do one of the following:
| To compress pictures for | Do this |
| Printing | Click Best for printing (220 ppi). |
| Viewing on screen | Click Best for viewing on screen (150 ppi). |
| Sending in an e-mail message | Click Best for sending in e-mail (96 ppi). |
| Keeping the current resolution and minimizing changes to the picture | Click Keep current resolution. |
-
TIP: If you have cropped any pictures, you can reduce the file size even more by selecting the Remove cropped picture regions check box.
-
Click Selected pictures only.